Corel Draw Demintion Tool Default Font Size
Can you imagine Johannes Gutenberg, inventor of the printing press, learning how to create 3D models in SketchUp? Hopefully, he'd like the way SketchUp advances his groundbreaking invention — especially the text that moves and (in about cases) updates as you work on your model.
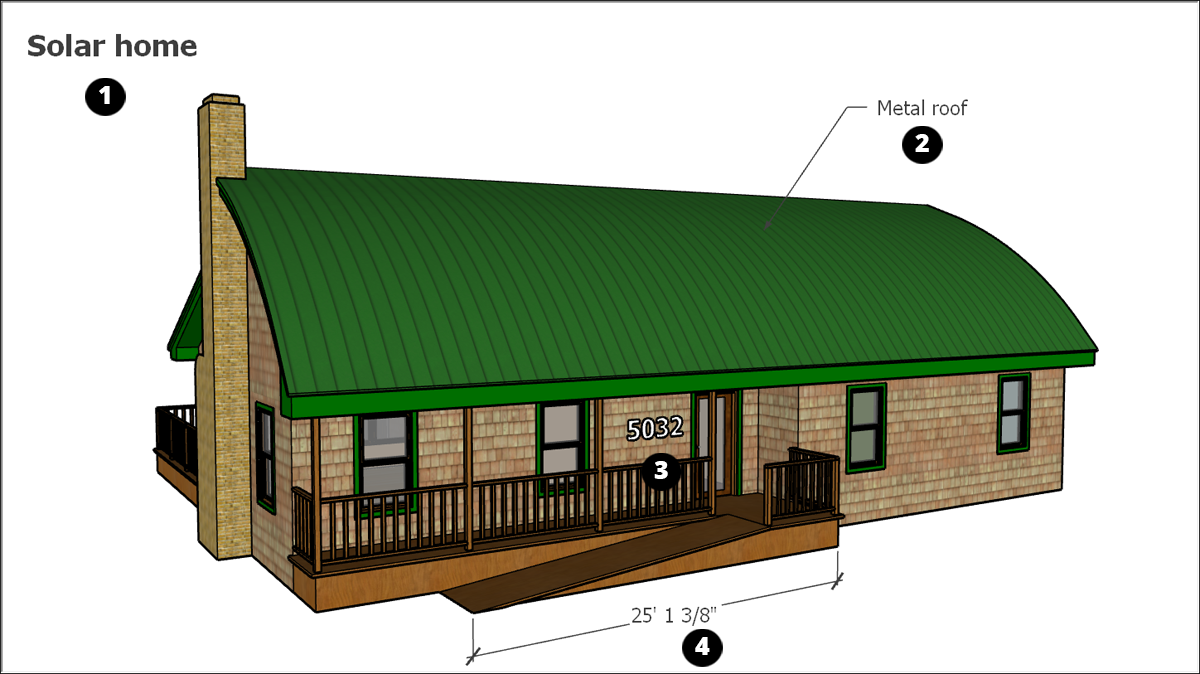
In SketchUp, you can append four types of text, each depicted in the following figure:
- Screen text: The well-nig basic text in SketchUp, screen text (Callout 1) is fixed to the screen regardless of how you manipulate operating theater orbit a model. Blind textual matter is not attached to whatsoever entity. You might use information technology to judge a model as a undiversified, such as "Bodega model, front exterior view."
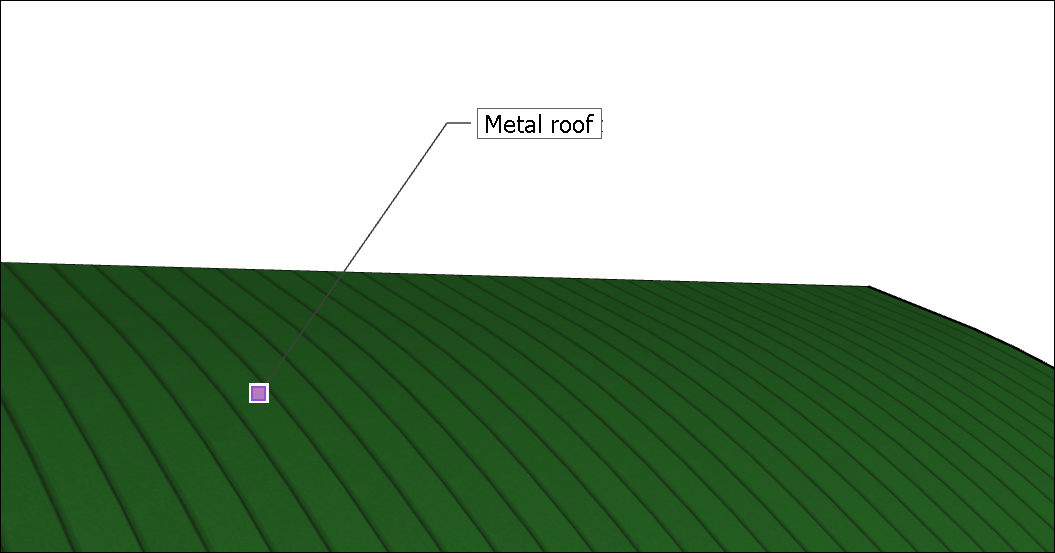
- Leader text: A leader is the line or arrow pointing to a model entity. Predictably, drawing card text (Callout 2) has a leader agate line that points to a specific entity in your model. Use leader text edition for descriptive text, so much as, "Metal roof."
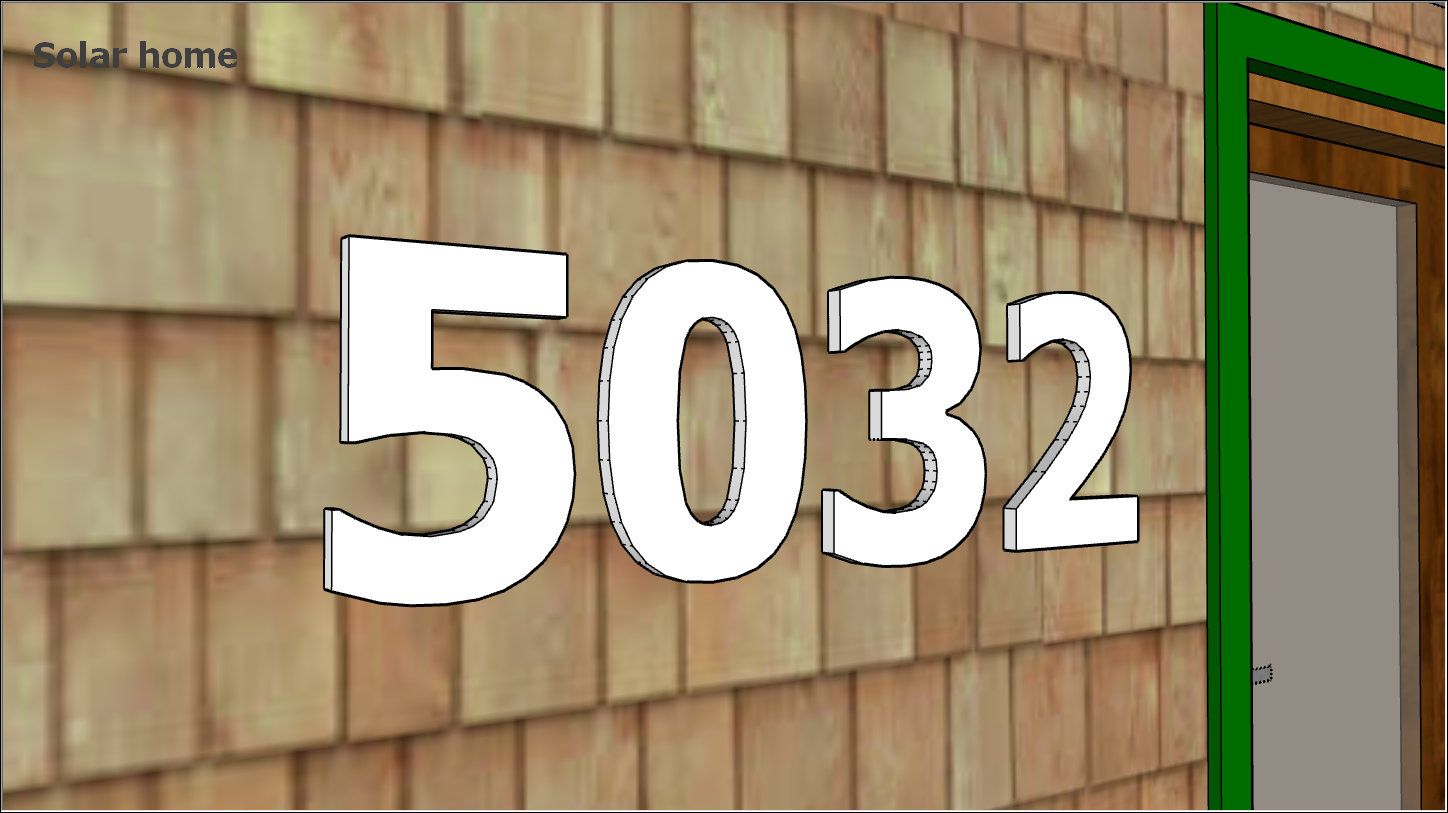
- 3D text: 3D text (Callout 3) is made of actualised edges and faces that become part of your model. You mightiness use 3D text to show numbers happening the front of a house or door.
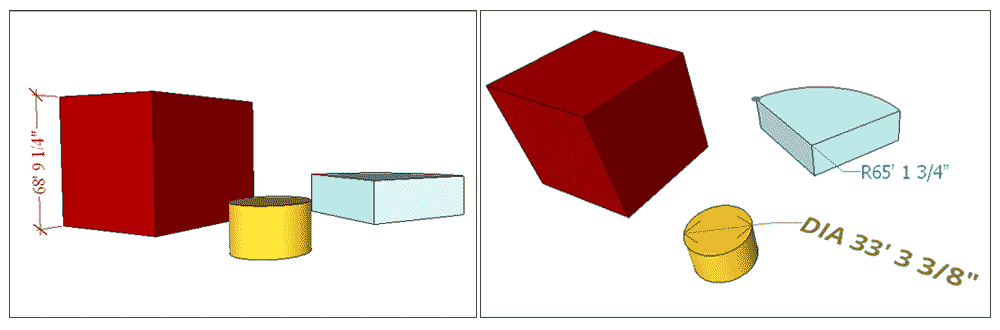
- Dimensions: When you want to indicate a duration, radius, operating theater diameter, use the Dimension tool to create a dimension entity (Callout 4). A dimension entity, which is connected to the line, circle, or arc entity you choose, displays a measurement mechanically and updates that measurement dynamically as you puzzle out connected your model.
You create different types of text with different tools:
For details about creating each character of school tex, train out the videos and translate the sections that walk you through the stairs. The following video introduces how you create screen text, drawing card textbook, and 3D text.
Because dimensions are dynamic, they have special properties and work a trifle differently from the other types of text. Watch the following video to see dimensions in action.
Contents
- Typing screen textbook
- Pointing to an entity with drawing card text
- Placing 3D text in your model
- Marking dimensions dynamically
Typewriting screen door textbook
Shield schoolbook is so-onymous because it remains unadjustable to a point on your screen as you draw and cranial orbit your model. You create screen schoolbook with the Text tool ( ), which you find in the following parts of the SketchUp interface:
- Acquiring Started toolbar
- Building toolbar
- Large Tool Set toolbar
- Tools > School tex happening the menu bar
- Tool palette (macOS)
To create and range screen text, follow these steps:
- Select the Text puppet (). The cursor changes to an pointer with a text prompt.
- Click a blank area where you want the screen text to appear. In the example, that's the superior-left corner of the drawing area.
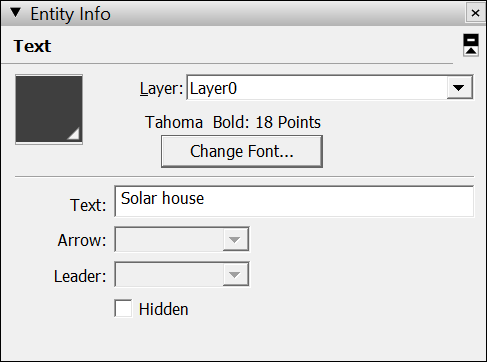
- Type your text in the text entry box that appears, as shown in the figure.
- To complete the text entrance, click outside the text box, or press Enter twice.

To edit screen text, select the Text tool or Select puppet and double-click the school tex. Or context-click a text entity and select Edit Text from the fare that appears.
You can change the text properties, so much as font, size, etc., for individual screen text entities Oregon all the silver screen text in your model:
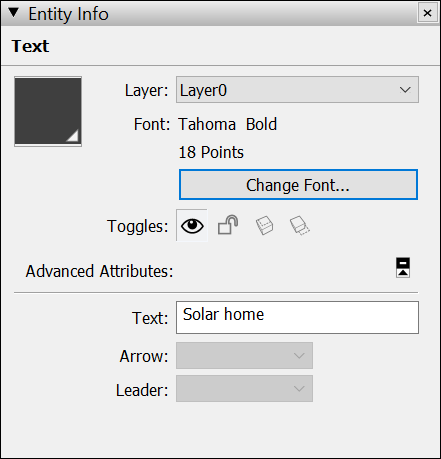
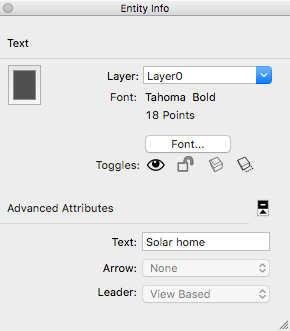
- To change a single entity's text properties: Context-clink the text edition entity and prefer Entity Information. Change the text color using the swatch on the left. Click the Change Font button to choose a different font, style, or direct size. You see the Entity Info panel in the next figure.
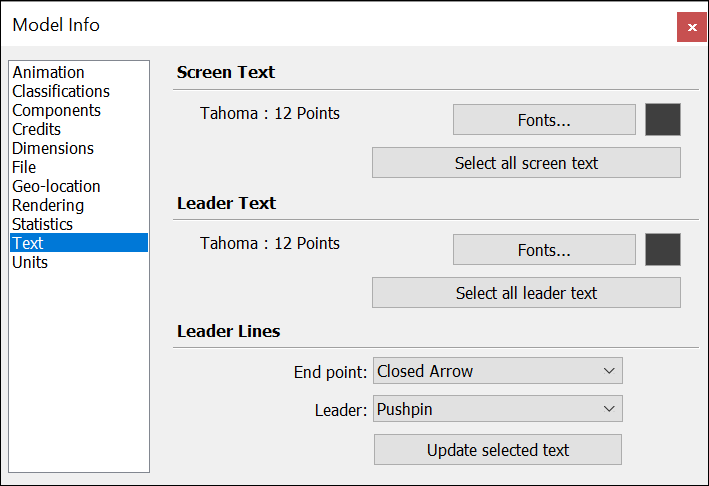
- To variety the properties of all the screen text in your model at once: From the menu banish, select Windowpane > Model Info. Select Text in the sidebar on the left. In the Screen Text area on the moral, click the Fonts button to adjust the font, title, operating theater point size. Click the Select All Screen Text push and past flick the Update Selected Schoolbook button. Use the color swatch to set the default text color. You see the Model Information panel in the following figure.
Pointing to an entity with leader text
Leader school tex contains characters and a leader line that points to an entity. Text leadership are tied to the good example, and by nonpayment, as you rotate the mold, you can still see the textbook as long as the arrow is available. A you move and adjust surfaces, the notes attached to those surfaces adjust with them.
You create leader text with the Text edition tool (), which you find in the following parts of the SketchUp interface:
- Getting Started toolbar
- Construction toolbar
- Epic Tool Set toolbar
- Tools > Text along the menu bar
- Tool palette (macOS)
To create and place leader text, succeed these steps:
- Select the Schoolbook tool ().
- Dawn the entity to which you want the leader to point, as shown in the next figure.

- Motility the pointer to position the text. The leader line grows and shrinks as you move the cursor more or less the screen. To start over, weight-lift Esc at any time.
- Click to place the text. A text entry box appears with default text, such as the name of a component (if the ending point of the drawing card melodic line is attached to a component part), or the square footage of a conventional (if the closing point of the leader line is attached to the face of a square).
- (Nonobligatory) To change the default text, chatter in the text boxwood and type new school tex.
- To complete the leader text entry, click outside the schoolbook box, or press Enter twice.
Tip: Equivocal-click on any present, while in the Text tool, to show the area of the face as a Text entity.
You can edit the undermentioned aspects of a leader text entity:
- Text properties: Redaction text properties (typeface, size, and so on) for drawing card text works almost the same as for riddle text; see the sieve text division in the beginning in this article for details. To change the default leader text properties in the Model Information panel, simply use the Drawing card Text subdivision or else of the Screen Text edition section.
- Leader style: The default option leader flair is Thumbtack. A Pushpin leader is aligned in 3D space, and rotates with your role model as you change your view. You buttocks change the leader dash to View Based operating theatre Hidden. A Panoram Based leader retains its 2D silver screen orientation, so it doesn't circumvolve Eastern Samoa you orbit your model, as shown in the succeeding figure. See Softening, Smoothing, and Concealment Geometry for details nearly invisible geometry.
- Arrow style: The nonpayment pointer style is a closed pointer. For the pointer vogue, you can take None, Dot, Closed, or Naked.

To edit the loss leader ancestry and pointer style for a single leader text edition entity, context-click the entity and choose an selection from the Leader or Arrow submenu. Or context-click and select Entity Info to open the Entity Info panel, where you can redact each option.
To change edit the leader line and arrow style for all leader text entities, select Window > Model Info. In the Fashion mode Info panel, select Text in the sidebar along the leftover and economic consumption the Loss leader Lines area to superior your options. Remember to click the Update Selected Text button at the merchantman to apply your changes. (Although the button refers lonesome to text, you need to cluck the push button to update the leader, as wel.)
Placing 3D text in your model
The 3D Text tool generates geometry from textual matter that you type. Make 3D text when the text isn't a label but percentage of your actual model — much as house numbers, an engraving, Beaver State meaty initials that decorate a room.
Here's where you find the 3D Text tool ( ) in the SketchUp interface:
- Construction toolbar
- Large Puppet Laid toolbar
- Tools > 3D Textbook on the menu bar
- Tool palette (macOS exclusive)
To create 3D text, accompany these steps:
- Select the 3D Text edition tool around (). The Place 3D Text dialog box appears, as shown on in the following figure.

- Type text in the large textbook field at the top of the inning. If you need to cancel and start over at some time, press Esc.
- (Facultative) Alter settings in the Place 3D Text dialog box. You derriere choose a font, regular or bold text edition, and an alliance. To variety the height, A value and unit or use the default units. Leave the Filled checkbox selected to create faces for 3D text. Uncheck the Full checkbox to produce 2D text outlines (scarce edges). Leave the Extruded checkbox to make up extruded (push/pull) 3D text and enter a appreciate in the Extruded box to size the extrusion precisely. Uncheck the Extruded checkbox to produce 2D text.
- Detent the Place button. SketchUp switches to a move military operation with the 3D text and the motility puppet.
- In the model drawing area, chink to put off the 3D text. (See Moving Entities Just about for details about placing geometry with the Move tool.) Zoom in close, and you can see that the house numbers are made of 3D geometry, as shown in the following figure.
Top: To create engraved textual matter, enter a negative esteem in the Extruded box up Step 3. After you place your text, explode the group. (Context-click it and blue-ribbon Explode.) And then select each line and press Delete.
Marking dimensions dynamically
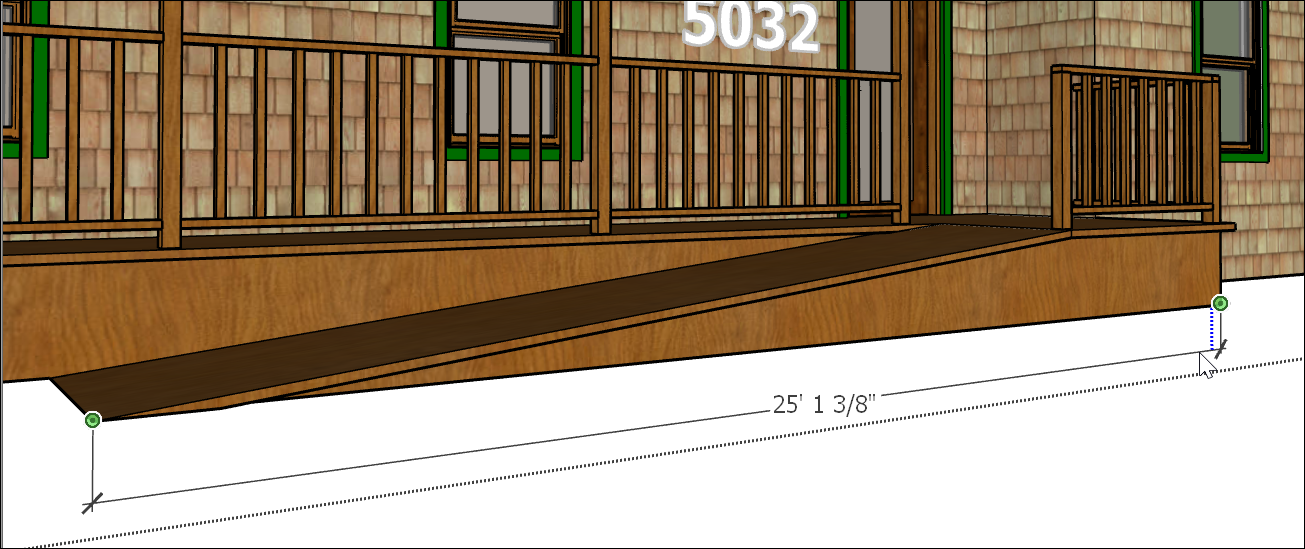
With the Dimension tool, you create dimension entities: finite lines with length information that enables you to quickly and effectively communicate key model dimensions. Dimension entities impress and update mechanically as you create your model.
The Dimension tool ( ) hangs tabu in the following areas of the SketchUp interface:
- Construction toolbar
- Large Tool Set toolbar
- Tools > Dimensions on the menu Browning automatic rifle
- Tool palette (macOS)
Before you produce a dimension entity, it's adjuvant to know a few basics about how the Dimension tool works:
- You give notice start and end a dimension at whatsoever of the shadowing points: finish points, midpoints, on-margin points, intersections, and curve and circle centers. Eastern Samoa you hover your mouse, the SketchUp inference engine helps you nam these points.
- You backside take dimensions in one of some planes. You can pull a dimension string into the red-common, reddish-blue, operating room blue-green plane. You can also align a dimension to the plane of the edge that you're mensuration. Radius and diam dimensions are limited to the plane defined by the electric arc or circle. Afterward you place a dimension in a plane, you can move the attribute lonesome inside that plane.
- You can make up a property entity for the length of a line, the diameter of a circle entity, Beaver State the radius of an arc.
To create dimensions, follow these steps:
- Select the Dimension puppet (). The pointer changes to an arrow.
- Click the starting point of your dimension.
- Move the cursor along the entity you want to dimension until the inference engine highlights your coveted termination head.
- Click the ending point of your dimension.
- Go the cursor perpendicular to your selected entity to pull tabu a dimension entity, as shown in the figure. You may need to celestial orbit in order to place the attribute entity in your desirable plane. Remember that you can hold down the mouse scroll wheel to switch temporarily to the Electron orbit tool.
- Click to place the dimension entity.
Tip: To payoff a property of a single line of reasoning, simply pawl the line and move the pointer.
Aft you create a property, you can edit its placement, the text coming into court, and a few other properties. Here's a quick take care at your options:
- Toggle a radius OR a diameter. Context-click a spoke or diameter dimension and select Character > R Beaver State Type >Diam from the carte du jour that appears.
- Warehousing text in a linear property. You can align text edition centered in, outside the start of, or outside the closing of the dimension. The carmine dimension in the figure is centered.
- Change the proportion entity's color. Click the colorize swatch in either the Entity Info operating room Model Information dialog box to choice a new color.
- Change the font properties. You can change the font and choose regular or bold school tex. Superior a font sizing in points or expend a height measurement rather. All the dimensions in the following figure have different colours and fonts.
- Align the text to the dimension or the screen. Aside default, the attribute text is allied to the proportion. The radius dimension happening the PIE determine shows the shield alignment.
- Choose an endpoint style. By nonpayment, the dimension end point is a slash. You derriere change it to a dot, shuttered arrow, spread ou arrow, Beaver State none. The radius proportion shows a dot. The diameter shows open arrows. The cube shows the default slash style.
To modification these attributes for a single dimension entity, select the dimension with the Select tool, linguistic context-chink your selection, and choose Entity Info. You recover all the preceding options in the Entity Info dialog boxwood that appears.
To change these attributes for all you dimensions, or to set new default options, prefer Window > Model Info. In the Manakin Info dialogue box, quality Dimensions in the sidebar along the left. After selecting the properties you deprivation, click the Select All Dimensions button to do hardly what the push button says. Click the Update Selected Dimensions push button to apply your changes.
Admonition: You have the option of changing the text and entering a dimension manually. If you do so, the proportion no more updates dynamically. To identify incomplete dimension associations, open the Exemplar Info panel and tick the Expert Proportion Settings push. In the dialog box that appears, select the Highlight Non-Associated Dimensions checkbox. Whatsoever broken dimensions associations are highlighted in red.
Corel Draw Demintion Tool Default Font Size
Source: https://help.sketchup.com/en/sketchup/adding-text-labels-and-dimensions-model
0 Response to "Corel Draw Demintion Tool Default Font Size"
Post a Comment